Getting started: Riverside Recording Basics

Here is a lightly edited transcript of the recording, supplement to How to Create a Podcast on Riverside from Paul Gewuerz from Made to Order Audio and Localpod.co:
Recently, I hosted a workshop for the NichePublisher.biz community on using the Riverside platform for video and audio podcasts.
During the call, we were not able to actually record on Riverside because we were also on Zoom, so this quick video shows the steps for how to record.
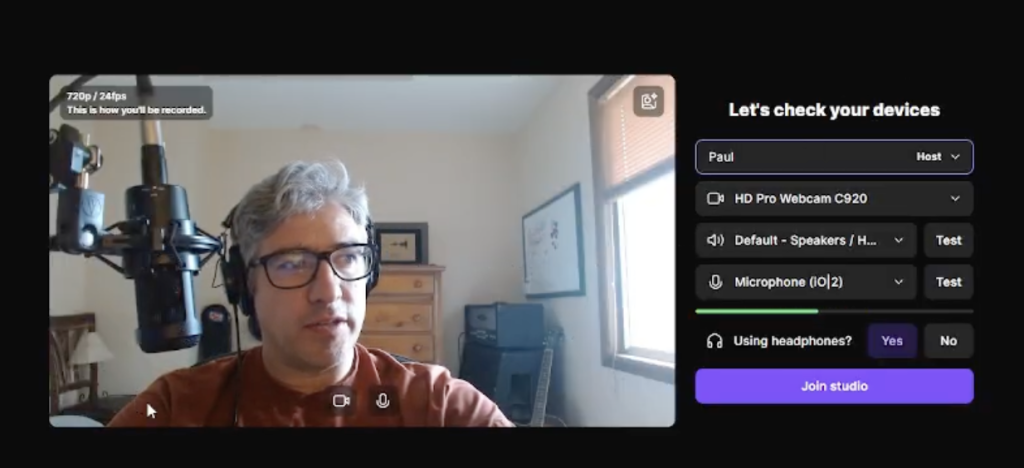
On the main page, click the Record button to start. It’ll take you to the next screen to start setting up by selecting your recording equipment.
First, on the right rail, type your Name. That is the name that shows up on-screen when you’re recording, and in transcripts after the fact.
Then o,n the right rail, choose the Camera, Headphones, and Microphone that you will be using, which you can test by speaking into it and seeing the waving line.
Whether or not you’re using headphones is important; if selected incorrectly, you may get an echo on the finished audio recording.
Once you’re ready, click Join Studio.
Sometimes Riverside thinks that you’re not wearing headphones, so it asks again. Just click “Yes, I am.”
Once inside the recording studio, there is a new right rail with new options such as other people on the call and the recording equipment they’re using. You can also chat with them, set up a Livestream, and choose Destinations such as YouTube, Facebook, TikTok, and so on.
Best practice is to do this ahead of time, not live on the call, because there are usually some hiccups connecting to these different destination sites.
In the right rail navigation, under Brand, add your logo and how you want it to appear.
Under Media, there are some built-in audio and video options to add to the recording if you want.
When ready to record, hit the big Record button, and you’ll see a countdown. This will not show up on the finished product; it just gets everybody ready.
Then you are live!
At the top, a red Timer shows how long you’ve been recording.
If you have a script and are just a talking head trying to record something such as a YouTube explainer, you can paste that above the video to use as a teleprompter. You can also click Teleprompter and Play, then scroll down in real time, which is pretty cool.
I always tell people when using Riverside, if you’re recording and mess up, there is no need to start a new recording. It’s easy to clean all that up in the post-production, so just start your sentence or the paragraph over, and clean it up on the back end.
When done, don’t forget to hit Stop, the same place as Record. That will trigger it to save and upload the project.
If you do forget and just close the browser, or your guest leaves when you say, “Hey, have a great day,” it’s not a big deal. Worst-case scenario is you may have to click on a link – or have your guest click on a link – to finish uploading the full video.
Once it says that the video is fully uploaded, click on “Go to Project” to go to the project and edit.
This is basically the starting point of the last workshop on all the tricks of the trade for editing using Riverside.
If I missed anything or if you have any additional questions, please reach out to me directly anytime: Paul Gewuerz on LinkedIn, or email paul@localpod.co. I love helping and am glad to point you in the right direction if I don’t have the answer.
So that’s all for today, guys. Thanks again, and have a great day.